Bathroom rip-out guide

Want to install a new bathroom? You don't have to wait around for a skip to be delivered to get started on removing your old one - with a HIPPOBAG you can get right to it. Combine your HIPPOBAG with our handy guide to removing your bathroom suite and there's no quicker way to make room for your bathroom upgrade! As a rule of thumb before you start if you still need the room up to the last minute remove last what you need most – for many this may be the toilet.
WHERE DO I START?
The very first step is to ensure that all the utilities are turned off and made safe before you do any work. For your bathroom, this means water and electric. Make sure you remove as much water as possible from the pipework before removing the sink/bath/toilet.
- You can find a list of accredited plumbers here to help you with the water
- For electrical assistance check this list of qualified electricians
Before you begin, have somewhere to store your waste. A MEGABAG is the perfect size to fit a bathroom, just make sure you set it up somewhere it can be collected from and get filling. Check your bathroom dimensions against our bag sizes first – 1/5 bathrooms are big enough to fill our biggest HIPPOBAG.
Removing the toilet
First check the waste connection and water are disconnected as you may need to move the toilet to free it. The next step is to drain down the cistern that holds the water for the flush – either with help from a plumber or using a small jug to empty into a bucket or sink. It is then important to remove any water from the base of the toilet (commonly referred to as the bowl).
Next, unmount the cistern from the seat - they're usually bolted together from the underneath of the base unit. Once you have moved this the next step is to remove the bowl or base. This may be both screwed to the floor at the base and grouted/siliconed to the floor.
If it is grouted in, cut around the base where it meets the floor. While there are several chemical solutions to help remove silicone, all rely on cutting away what you can first – wear protective gloves and work slowly to reduce any chance of scratching the base. Be careful when lifting as the base can be quite heavy.
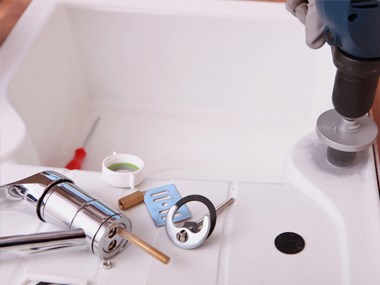
Removing the sink
Typically your sink will come in two parts, unless you've had yours custom built into a freestanding vanity unit. The main bit is the bowl, this typically sits on a mount, or pedestal and this may extend all the way down to the floor. As with the toilet first isolate / cap off the water & disconnect the waste supply.
Commonly, the basin will have 2 anchor points connecting it to the wall which can be seen most easily from beneath. Bear in mind that these basins can be heavy and often only balanced on the pedestal they balance on. When undoing these connections make sure you prop up the bowl or have someone to help steady it. You may also find that the sink can be anchored to the pedestal with bolts from underneath so you may have to remove these too.
If the sink is siliconed & grouted against the wall, remember the guidance about safely cutting or trimming back to avoid both injury to you and damage to the surfaces.
Once the pedestal is free of the basin above it is worth first inspecting how the water pipes and waste are hidden in the column as it rises from the wall or floor. It is important to know this as when moving the pillar free from the floor (once any silicone or grouting has been cut away) you don’t want to cause damage to the pipes or create a hard to control leak.
Removing the bath
If you don’t have a free standing or roll top bath which has easy access to waste and water pipes to disconnect the waste and water you may need to remove the bath panel. This is usually held on with screws.
If it is freestanding it should be easy to remove from this point – remember if you are using one of our MEGABAGs to stack it in the middle and place any other waste around it.
For a built-in bath it can be quite common to find that the tiling meets the bath - this may make it difficult to lift out or free up. If the space allows you to lower the feet, do so and you'll find the bath moves away from the tiling. A typical modern bath can have between 6 and 8 self-levelling feet which are adjusted when the bath is fitted and can be undone by hand or with a small spanner.
If the bath is recessed into the wall you may need to seek professional advice if anything other than removing skirting board is required.
Stacking your waste
If you have a plastic or fibre glass bath it is likely the toilet and wash basin are likely to be the heaviest single items – if you are using one of our MEGABAGs these are best stacked in the middle with other waste around the outside.
If you need the services of a kitchen installer our friends at the IKBBI (The Institute of Kitchen, Bedroom and Bathroom Installers) can help you find a registered installer.