How to remove your kitchen

When it's time to put a new kitchen in, there's one big job that comes first: taking the old one out. It can seem like a big task but if you read our guide, you'll be able to get it done quickly and efficiently.
Don't forget that if your current kitchen is in good condition and fully functional, you can consider selling it once you've removed it - just make sure you take extra care while taking it apart. You should also number your units as you take them apart and take pictures as a visual guide of how to fit it all back together.
Some common rules to think about before you start include thinking about the space available, rather than how it's used presently, considering the sink/cooker/fridge triangle and optimising lighting and ventilation.
Where do I start?
The very first step is to ensure that all the utilities are turned off and made safe before you do any work. This includes gas, water and electric.
- You can find a list of accredited plumbers here to help you with the water
- For electrical assistance check this list of qualified electricians
- Gas disconnects must be done by an accredited installed on the Gas Safe Register
Before you begin, have somewhere to store your waste. A HIPPOSKIP is the perfect size to fit a kitchen, just make sure you set it up somewhere it can be collected from and get filling bearing in mind to put the heaviest items in the centre, ideally at the bottom.
Removing appliances and sinks
It's worth repeating that you should make absolutely sure your utilities are safely switched off before starting.
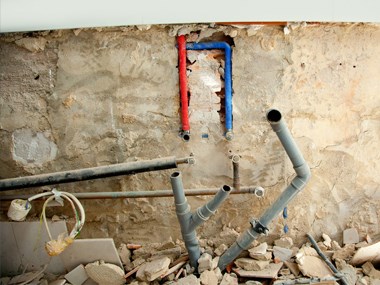
When moving items likely to contain water (dishwasher, sink, etc) make sure that the pipes stay upright to avoid spillages. These items are usually connected with at least 2 hoses - they regularly have 3 - with hot (red), cold (blue) and waste (grey) outlets. Be careful when lifting - these are heavy items and it could be best to do the moving with a second pair of hands.
Once your hob, cooker and extractor hoods are ready to be removed, you'll want to refer to their original guides to make sure you remove their fittings correctly. If you can't find your copy or don't have one, make sure you check the manufacturer website. These appliances often have specially made fixings that can be confusing to remove without guidance.
While HIPPO accept most kitchen appliances for collection, it's worth noting that some of these items such as fridges and TVs are deemed hazardous and carry and additional charge for disposal by Waste Transfer Stations we use to recycle and dispose of your waste.
A standard size sink can be removed relatively easily - just make sure the waste connections are disconnected and the mains water supply is off. The water tight sealant around the sink, and under-counter fixings, are potential issues to doing this quickly. Looking underneath the sink helps reveal these fixings and anchor points while the sealant can be gently cut away (ensuring you are wearing protective gloves) – take care to go slowly as this gives you control and avoids and unnecessary damage.
Removing work surfaces
Your work surfaces will have fittings on the underside. Undo these to release the surface for removal. At joins, you may have a bolted or mitred joint, in which case you should undo this as well. If you have tiled splashbacks, you may need to remove the bottom row to free the worktop. Many unbroken lengths of worktop can be very heavy so consider a trial lift and help from another person with longer parts.
Removing the doors and drawers
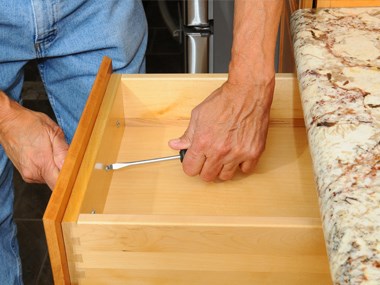
This is generally a nice, straightforward step. Many modern cabinets have a release clip, allowing the removal of the doors without needing to undo the hinges. Of course, it's likely that your kitchen isn't cutting-edge if you're replacing it - luckily the second way of unscrewing the hinges doesn't take too long either.
Make sure you store the doors flat and with a sheet between each to avoid scratching if you are looking to resell your kitchen.
A drawer can be lifted away by pulling it up to release from the runners. Many drawers have a retaining clip that will need to be released for the drawer to detach.
Removing the cabinets
The cabinets themselves will be fixed to the wall via various types of brackets. The base units generally have simple fixing points through the back wall of the cabinet, and this really only serves to retain them in place as all the weight is taken by the legs underneath the base. Where several units are positioned side by side, there will normally be two screws in each fastening it to the next unit, so these will need to be removed as well. Having removed the fixings, the unit can be lifted out and taken away.
The wall units, on the other hand, have more substantial brackets which take the full weight of the unit (plus contents). To remove these, it's usually a case of slackening the screws at the back on each side and, having removed any screws between cabinets, lifting the unit up off its brackets. If it is screwed direct to the wall you will need extra help to take the weight as you free it from its anchor points.
What to do with your old kitchen
If you're getting rid of your kitchen in a HIPPOSKIP, this is the best way to fill it:
- Border the bag around the edges with wood, such as from your cabinets - this will give the bag solid borders and keep it stable
- Put the appliances and other bulky items in the middle
- Fill in any smaller waste and rubble in between

If you are keeping the old kitchen to sell or re-use storage is key. Stack all the cabinets carefully along one wall – base units first then wall units on top. Worktops should be placed on their back edge and lent against these. Put a protective layer between each section to reduce the risk of scratching.
If you think your kitchen is reusable but just want to be rid of it asap, consider a service like Freecycle or contact your local charity shop to see if they can resell your old units.