How to Lay Decking - A Step-by-Step Guide

With the summer months finally here, now is the perfect time to spruce up your garden, complete all of those DIY jobs that have been on your to-do list for as long as you can remember and enjoy your garden.
A great way to enhance the functionality of your garden is to lay down new decking. Creating a space that lends itself perfectly to al fresco dining and lazy days in the sun, decking is a great addition to any outdoor space.
If you’re thinking about laying decking this summer, you’ve certainly landed in the right place! We’ve created a helpful guide outlining everything that you need to know.
What you will need
It’s true what they say… fail to prepare and prepare to fail! With this in mind, before laying down your decking, it’s important that you have the right tools to get the job done.
Here’s a list of the tools you’ll need:
• Spirit level
• Pegs and string
• Hammer drill
• Screwdrivers
• Wood drill bits
• Circular saw
• Club hammer
• Tape measure
• Spade
• Wood preserver and varnish brush
• Safety equipment: Goggles and gloves
Step 1 – Plan ahead
Before you get to work laying down your new decking, it’s important to sketch out a rough layout of the area and check you have enough decking to cover your new patio area. You should also lay out the pieces of wood in position to see if the layout suits the rest of your garden.
Once you’re happy, mark the area where your new decking will be and check that there aren’t any obstacles such as manhole covers, door openings and trees to put a spanner in the works.
All decking must run parallel to the house
A lot of people don’t realise that the top of the decking must run parallel to the house and be at least 15cm below the damp proof course (DPC) in order to comply with building regulations. If you’re unsure of where the DPC is, look down low for where the masonry wall meets the foundation.
Step 2 - Measure up
This is one of the most important parts of laying decking. It’s essential that you take accurate measurements in order to achieve the best results.
Using your plan, measure your decking in square metres, so that you’re able to easily determine how many packs of decking boards you need. Of course, if you’re unsure you can always take the plan to any DIY stockist, and they’ll help you work out what you’ll need.

Step 3 - Prepare the ground
Next you’ll need to start preparing the ground. Mark out the area with some pegs and string, and dig out any turf or vegetation. Then, firm down the soil and lay decking fabric over the area to prevent any weeds growing through, pegging the fabric down or using concrete slabs to weigh it down in place.
The framework for decking needs to be placed onto a firm concrete foundation, so it’s much easier to use concrete slabs. Lay your slabs out in a grid pattern roughly 15cm apart, as these will be needed to support the joists that will hold the decking boards in place.
Finally, use a spirit level to make sure the decking will slope away from the house ever so slightly – this is important for draining.
As general rule of thumb, for every 10 metres of decking, drop it down 1 centimetre.
Step 4 - Build the framework
Now it’s time to start building the outside framework of your new decking area, using joists that measure 15cm high by five cm wide, resting on the concrete slabs. Fix it together using 100mm rustproof screws and external wood glue. Next, fill the frame with joists spaced at 400mm intervals at right angles to the frame and screw them in.
Step 5 - Attach the decking boards
Next, you’ll need to attach the decking boards. Put down four to six boards at a time, screwing the ends along the frame first, then work down the centre. Space the boards out by five millimetres (or the width of a fixing screw) to ensure that the decking is ventilated and allows room for wood expansion in warm and wet weather.
A top tip is to pre-drill the screw holes to reduce the risk of splitting the wood.
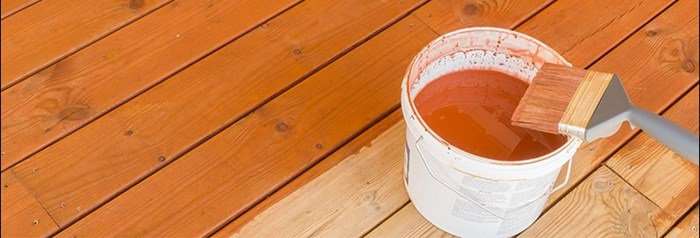
Step 6 - Finishes
Decking is available in lots of different finishes and colours. However, like any exterior feature, it will succumb to wear and tear over time. A great way to enhance the aesthetic appeal of your decking and ensure that it lasts as long as possible is to treat it with paint so that it is well protected.
Maintenance
Each spring, make a conscious effort to check the boards and fixtures, and repair or replace any loose or splintered boards. You should also deep-clean once a year with a deck cleaning solution to remove any algae, moss or dirt.
Finally, when laying your new decking, make sure to dispose of any offcuts or decking boards safely. Under no circumstances should you be tempted to burn any offcuts as they contain preservatives and chemicals that will give off harmful toxins.
Why choose HIPPO to dispose of your waste?
Here at HIPPO we provide a range of HIPPOBAGs, Skip Hire and Man and Van services that have been designed to offer convenient, cost-effective and reliable options for waste disposal that works for you - no matter how much garden waste you have.
<>Now all that’s left to do is to enjoy your new decking!